Luxury vinyl tiles are some of the most attractive elements to consider if you have been looking to add a durable and yet decidedly alluring ambience to any room.
While there are countless styles and varieties to choose from, it is also important to remember that preparation is critical if you hope to avoid any mistakes during the installation process.
Whether referring to sub-floors made of concrete, wood or vinyl, there are a handful of suggestions to keep in mind. Let us take a look at some primary concerns and how each can be addressed.
Cleaning the Sub-Floor
This is by far the most important step, as any subsequent
vinyl floor adhesive will fail to adhere properly if dirt or grime are present.
Vacuum up the remaining small particles and if necessary, mop the surface. Allow at least 24 hours of drying time before moving on.
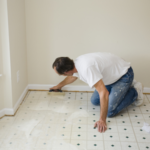
Ensuring that the Sub-Floor is Level
Using a carpenter's level, note any high or low spots that may be present. Mark these with a grease pencil or chalk. You can then utilise a patching compound to fill in such imperfections.
This compound may need to be sanded after it has dried (depending upon the instructions). Once again, check to ensure that the sub-floor is completely level.
A Final Overview
Assuming that the aforementioned steps have been successfully completed, be sure to check the sub-floor for any imperfections such as nails or tacking strips.
It is wise to employ a handheld floodlight, as these elements will be much easier to detect. Remove these objects as may be required.
Installing
luxury vinyl floor tiles does not have to represent a complicated process if you follow the steps outlined above. For additional advice, please contact the specialists at Flooring Supplies Direct at your convenience.