
How To Install Laminate Flooring
[caption id="attachment_100" align="aligncenter" width="640"]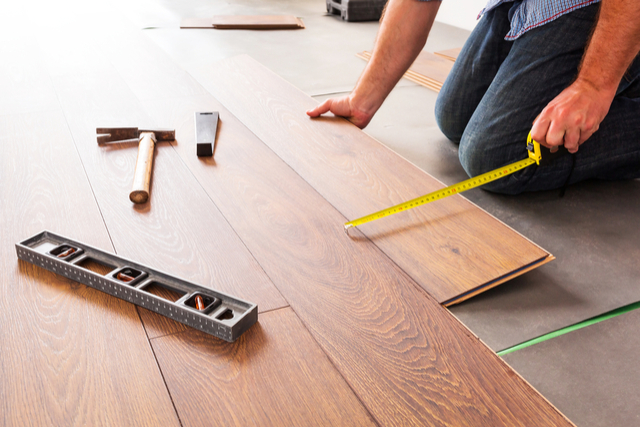 Laminate flooring installation in progress. Find all the necessary accessories on our website.[/caption]
Laminate flooring is among the most beautiful types of flooring installed at a reasonable price. It consists mostly of wood, and it's resistant to heat, scratches as well as burns. It is also easy to maintain. Before starting the laminate flooring installation, you should make sure you have left unopened flooring cartons in the room where they'll be installed for the laminate to have a chance of acclimating.
- Verify the Surface
Before beginning, ensure that the surface where the laminate flooring is going to be installed is flat to make sure the new flooring will also be flat. Ensure the floors are clean and dry plus all debris or glue has been removed. If you're installing over concrete that is covered with tiles or over a concrete subfloor, place a six-millimetre plastic sheet vapour barrier, and then check to make sure all seams are sealed. Don't use plastic sheeting over a wood floor that is existing.
- Measure the Room
It's essential that the last and first planks have equal width, or they're almost equal in size. Also, the length of the last and the first planks should be almost equal. To have end planks that have the same width, you should measure room wall to wall then divide by the breadth of one plank. If you find that the remainder happens to be less than twelve inches, you should divide it by 2, and that'll be the width of the two planks: repeat this procedure.
- Mix Planks
When it's possible, install planks that have their length parallel to the incoming sun's rays. Start at the right or left corner of the room. Then, cut the first row; run the edge of the first row parallel to the wall with the spacers. It's recommended mixing planks from various boxes during installation because it'll create an excellent visual effect, and it'll be the best way of having a uniform flooring colour.
Additionally, it's also recommended aligning grout lines crosswise and lengthwise in a room. Place joints that are thin next to the ones that are thick.
- Install the Planks
The next step is installing the laminate flooring plank; insert each short end into one another at an angle, about twenty degrees, and pressing down. When you're getting to the last plank on the row, you should cut the plank embellishing side up if you're using a handsaw and side down when you're using a power saw, then fit into place.
Next, cut a new plank and follow the pattern you're creating; start a new laminate flooring row. Lift the previous row a bit to accommodate a new laminate flooring line in position. As for the subsequent planks, position the short end at an angle to join the planks. You should continue until you're done.
- Finishing Up
Take a piece of the flooring and use it in marking the depth of the door frame to be trimmed. Typically, laminate flooring has to extend below the frame of the door. Now you're ready for the last row installation. The last row should have an equal width to the first one. Leave some space for the flooring material expansion. If you need flooring supplies, Flooring Supplies Direct is a perfect choice. We have over four decades of experience in the industry of flooring.
Laminate flooring installation in progress. Find all the necessary accessories on our website.[/caption]
Laminate flooring is among the most beautiful types of flooring installed at a reasonable price. It consists mostly of wood, and it's resistant to heat, scratches as well as burns. It is also easy to maintain. Before starting the laminate flooring installation, you should make sure you have left unopened flooring cartons in the room where they'll be installed for the laminate to have a chance of acclimating.
- Verify the Surface
Before beginning, ensure that the surface where the laminate flooring is going to be installed is flat to make sure the new flooring will also be flat. Ensure the floors are clean and dry plus all debris or glue has been removed. If you're installing over concrete that is covered with tiles or over a concrete subfloor, place a six-millimetre plastic sheet vapour barrier, and then check to make sure all seams are sealed. Don't use plastic sheeting over a wood floor that is existing.
- Measure the Room
It's essential that the last and first planks have equal width, or they're almost equal in size. Also, the length of the last and the first planks should be almost equal. To have end planks that have the same width, you should measure room wall to wall then divide by the breadth of one plank. If you find that the remainder happens to be less than twelve inches, you should divide it by 2, and that'll be the width of the two planks: repeat this procedure.
- Mix Planks
When it's possible, install planks that have their length parallel to the incoming sun's rays. Start at the right or left corner of the room. Then, cut the first row; run the edge of the first row parallel to the wall with the spacers. It's recommended mixing planks from various boxes during installation because it'll create an excellent visual effect, and it'll be the best way of having a uniform flooring colour.
Additionally, it's also recommended aligning grout lines crosswise and lengthwise in a room. Place joints that are thin next to the ones that are thick.
- Install the Planks
The next step is installing the laminate flooring plank; insert each short end into one another at an angle, about twenty degrees, and pressing down. When you're getting to the last plank on the row, you should cut the plank embellishing side up if you're using a handsaw and side down when you're using a power saw, then fit into place.
Next, cut a new plank and follow the pattern you're creating; start a new laminate flooring row. Lift the previous row a bit to accommodate a new laminate flooring line in position. As for the subsequent planks, position the short end at an angle to join the planks. You should continue until you're done.
- Finishing Up
Take a piece of the flooring and use it in marking the depth of the door frame to be trimmed. Typically, laminate flooring has to extend below the frame of the door. Now you're ready for the last row installation. The last row should have an equal width to the first one. Leave some space for the flooring material expansion. If you need flooring supplies, Flooring Supplies Direct is a perfect choice. We have over four decades of experience in the industry of flooring.